Install Amiga OS 4.1 Final Edition on WinUAE
|
Preparing WinUAE
|
| 1. | 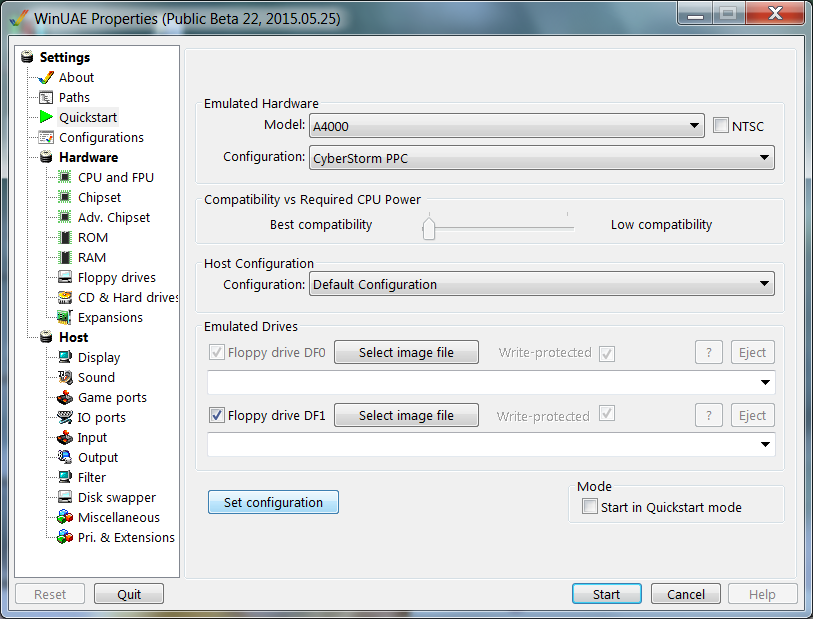 | Select "A4000, CyberstormPPC" from Quickstart. If the "Set configuration" button is visible, click it. |
2. | 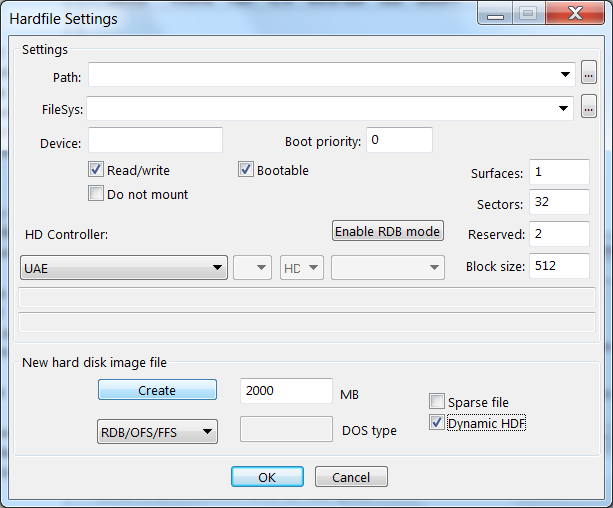 | Go to "Harddrives" and click on "Add Hardfile". Enter 2000 into the new hard disk image file size field, check "Dynamic HDF" and click on "Create". |
| 3. | 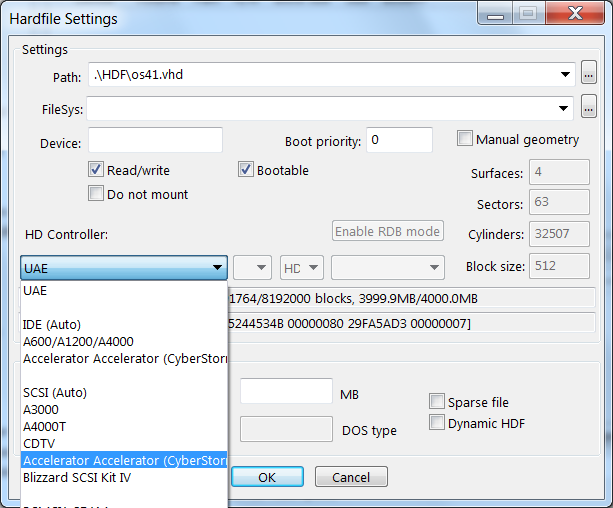 | Click on "Enable RDB mode" and change controller to accelerator board SCSI, then click on Ok. |
4. | 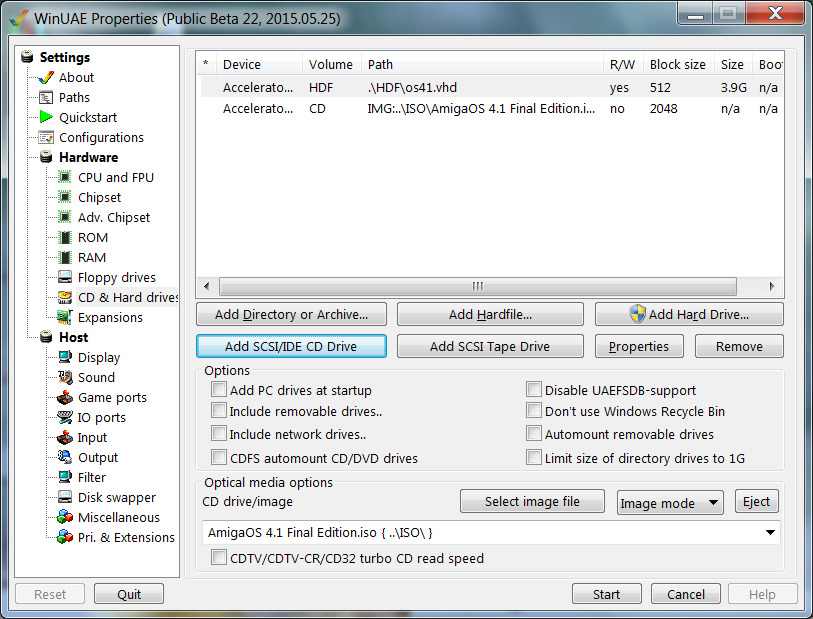 | Select the ISO image of your OS 4.1 CD as CD drive/image and click on "Add SCSI/IDE CD Drive". |
| 5. | 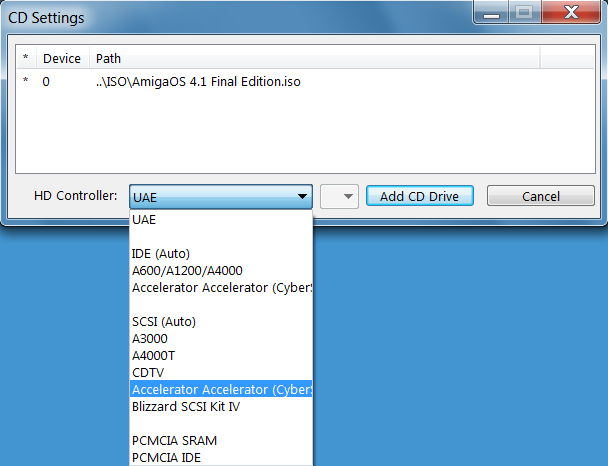 | Change controller to "Accelerator board SCSI" again and click on Ok. |
6. | 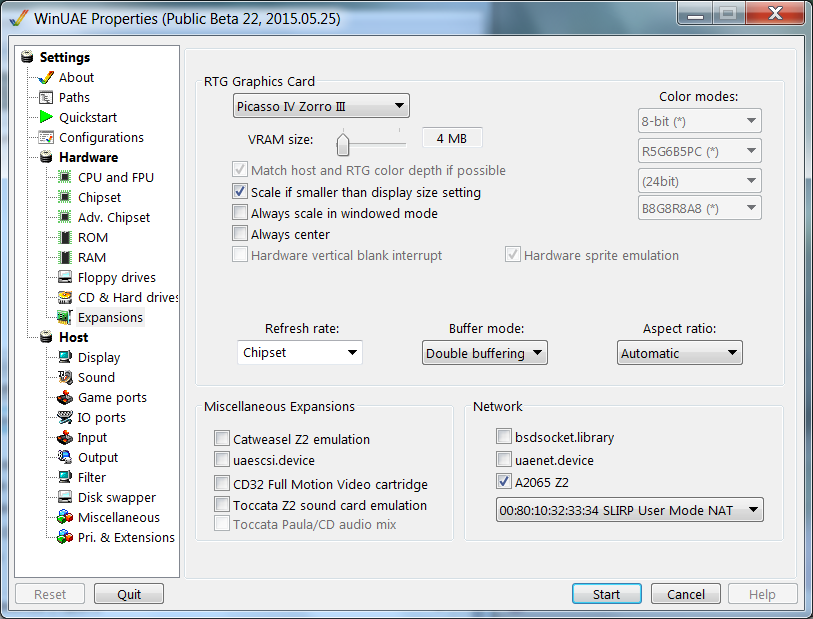 | Go to "Expansions" and select "Picasso IV Zorro III" graphics card. Enable A2065 for networking. |
| 7. |  | Go to "Configurations", enter a name and save the configuration. |
Prepare CyberstormPPC to boot from CD
|
| 8. |  | Click on Start and immediately hold down the Esc key until the Cyberstorm menu appears. If you do not get into the menu, press F12, click on Reset and try again. |
9. | 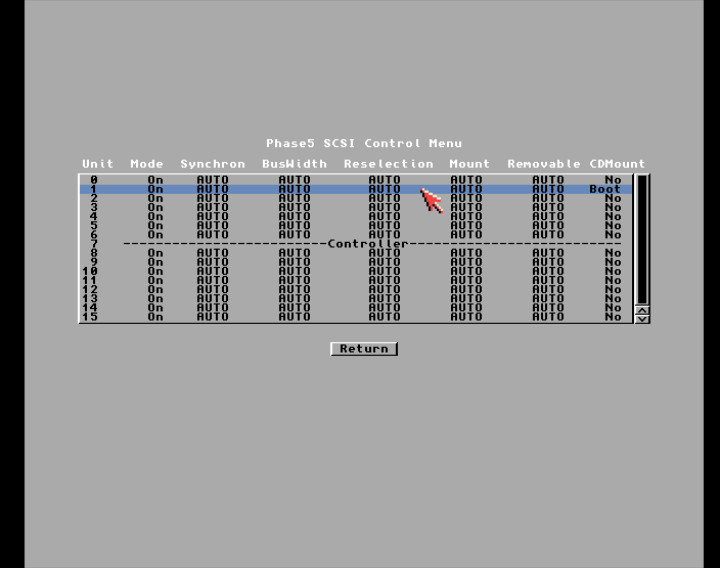 | Enter the SCSI menu and double click on unit 1 (the CD drive). |
| 10. | 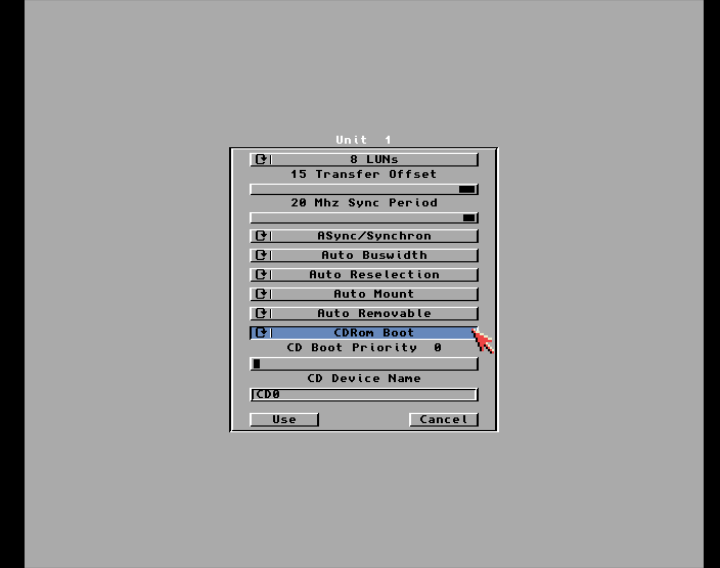 | Click on the boot option until it says "CDRom Boot", then click on Use |
11. |  | Click on save. |
| 12. |  | The Amiga should immediately begin to boot from CD. |
13. |  | |
| 14. |  | The menu offers you to change language and other preferences. These options are temporary only and if you reboot, you have to change them again. Given the speed of OS4 in WinUAE I refrained from changing anything at this point. |
Prepare harddrive
|
| 15. | 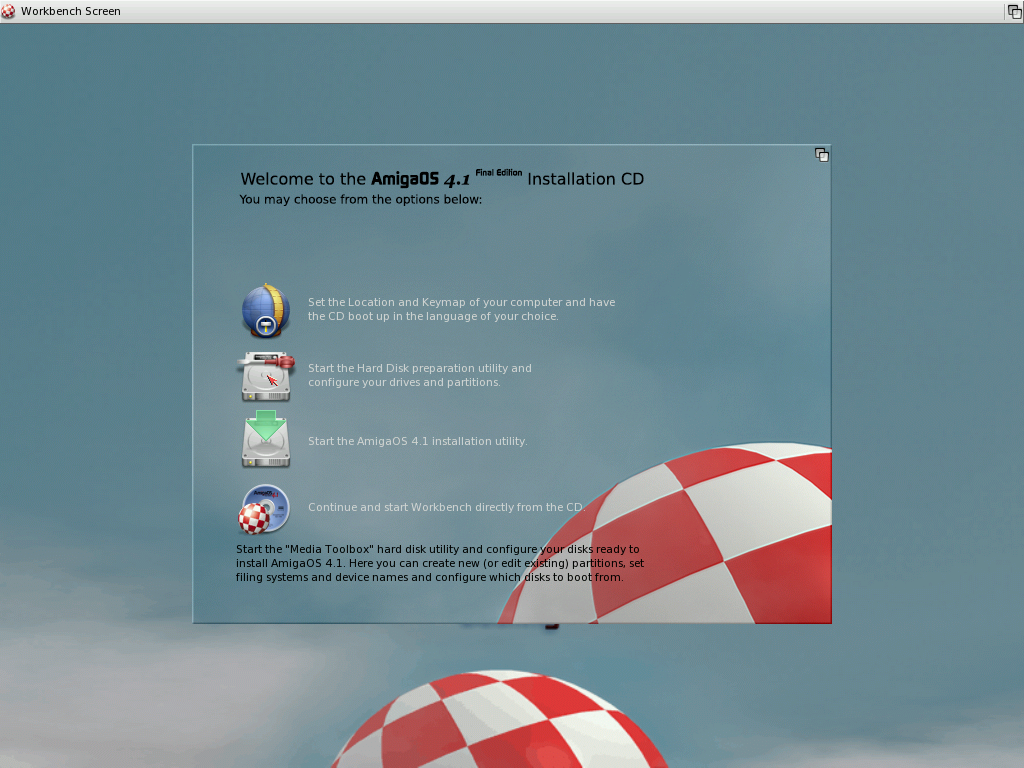 | Let's begin to prepare the harddrive. |
16. | 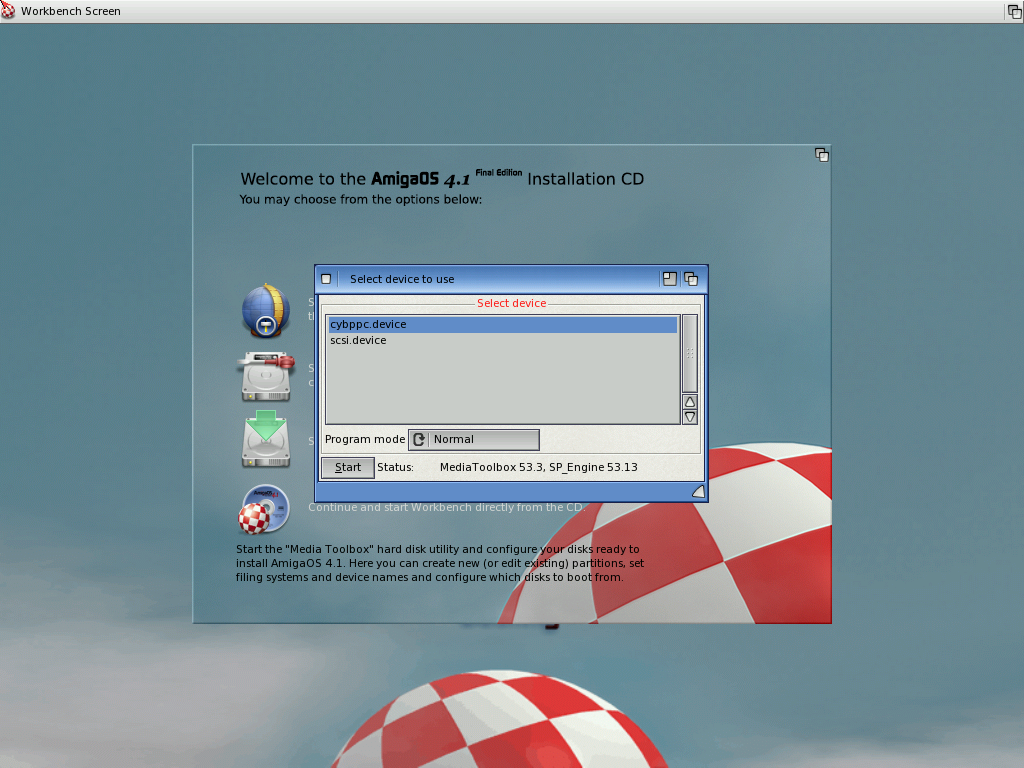 | Select cybppc.device. |
| 17. | 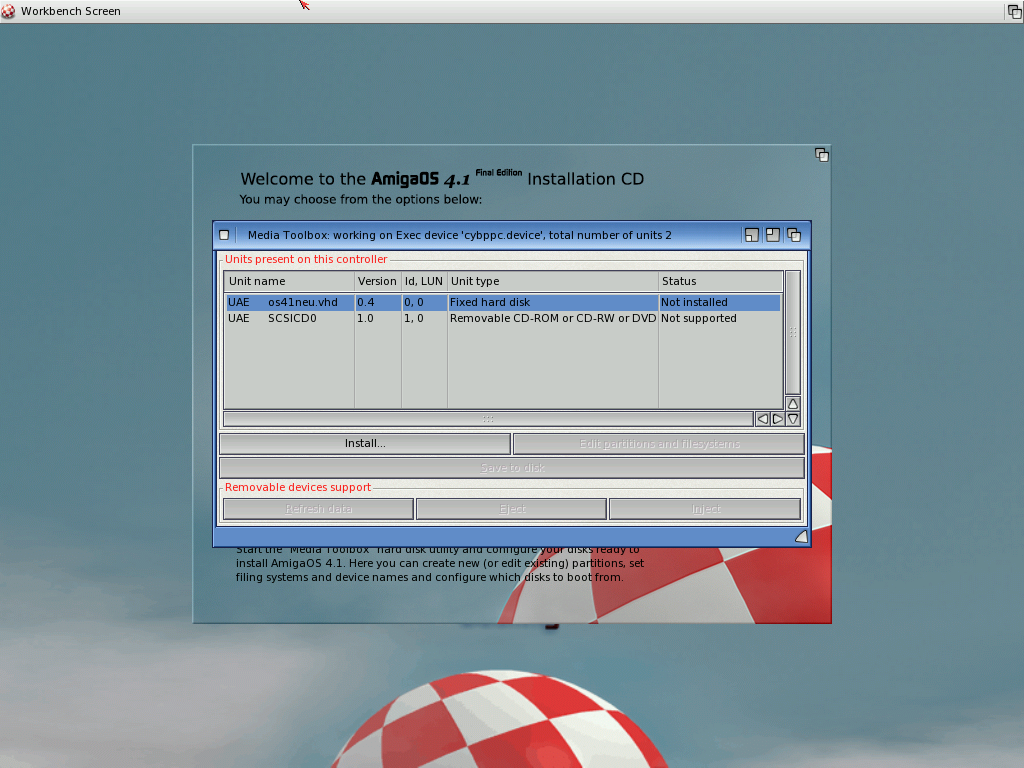 | Select the harddrive and click on Install. |
18. | 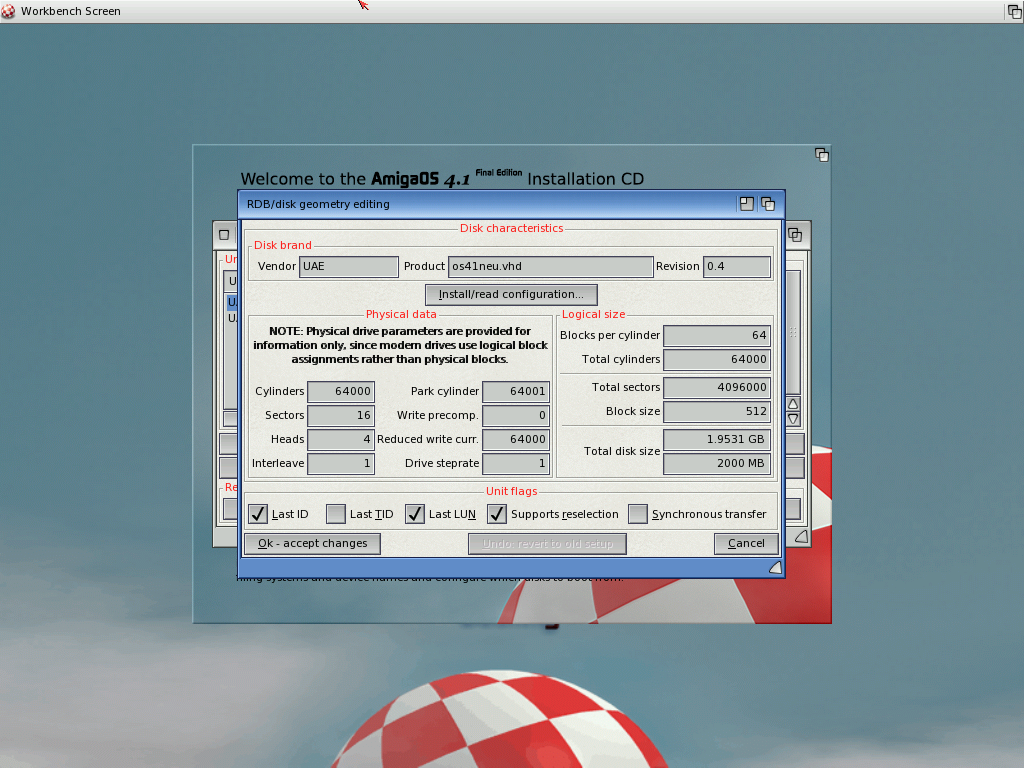 | The values shown should all be ok, not need to change anything. Just click on Ok. |
| 19. | 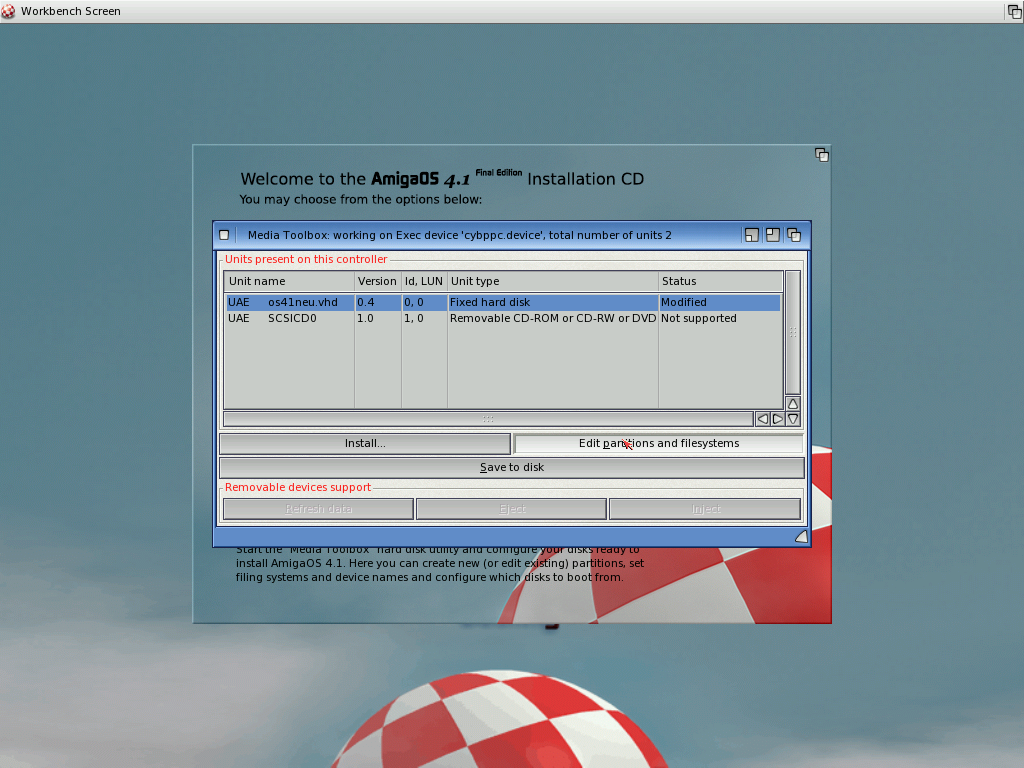 | Click on Edit partitions. |
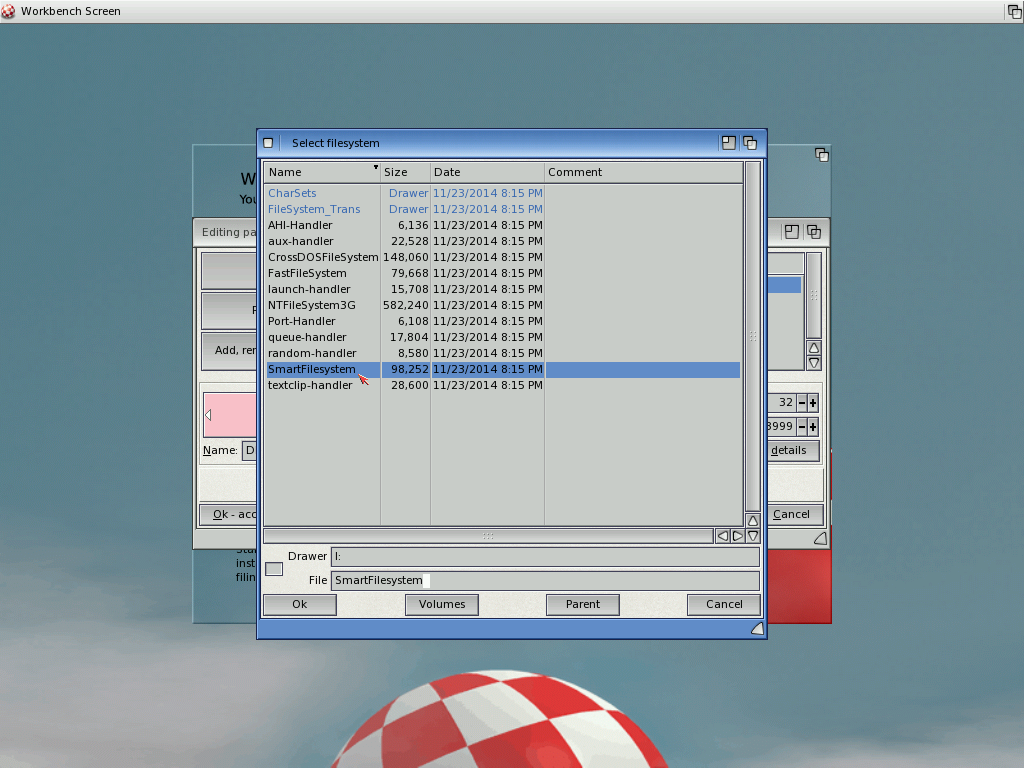
20. | 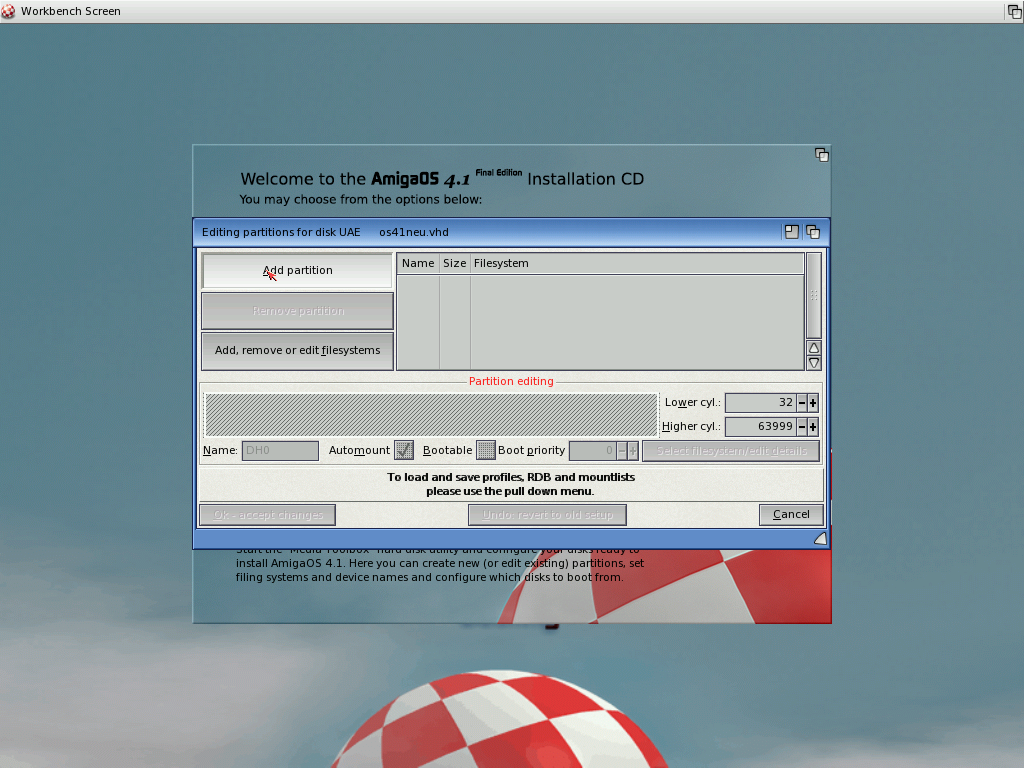 | Click on Add partition. |
| 21. | 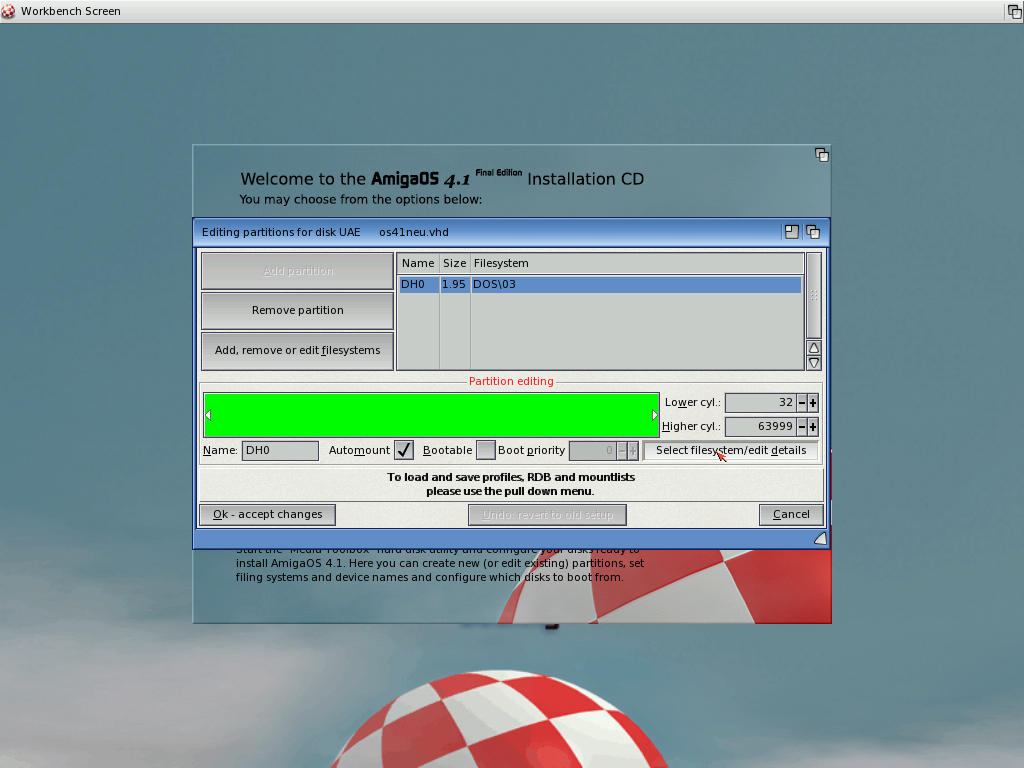 | The default settings are not suitable, we need to change them. |
22. |  | Now either select Standard file system with long file names... |
| 23. |  | ... or Smart file system. |
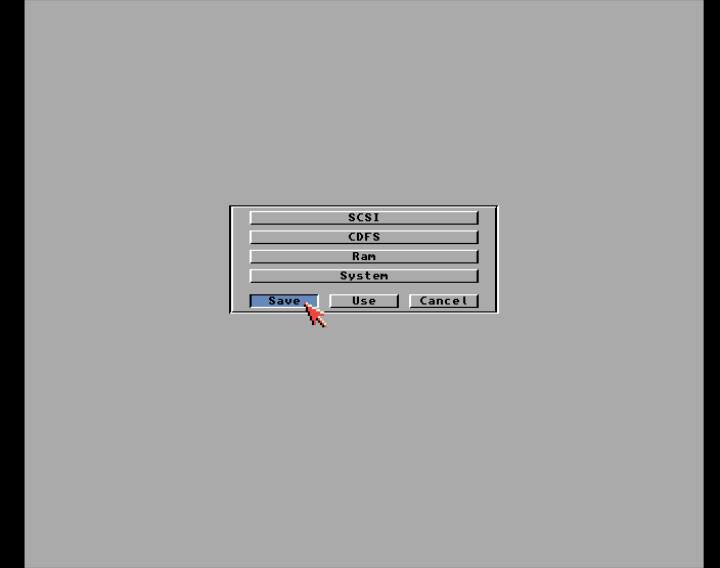
24. | 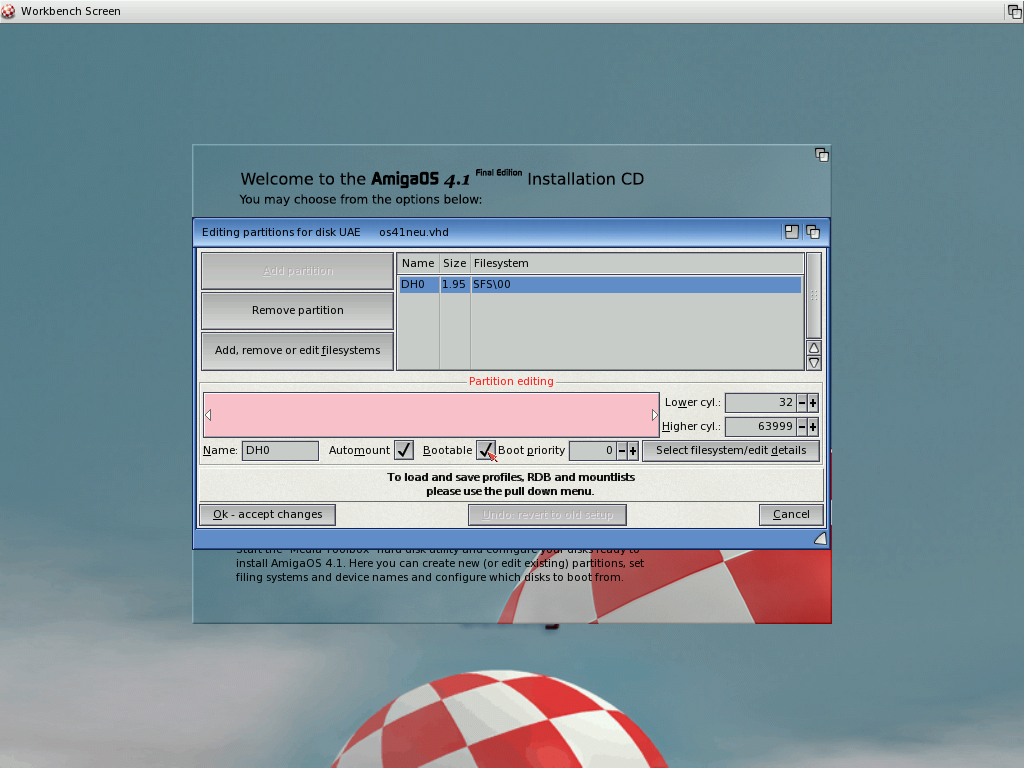 | Do not forget to make the partition bootable. |
| 25. |  | The 68k version of the file system has to be added to the RDB of the disk, otherwise the Amiga cannot boot from the HDD after power-on. |
26. |  | |
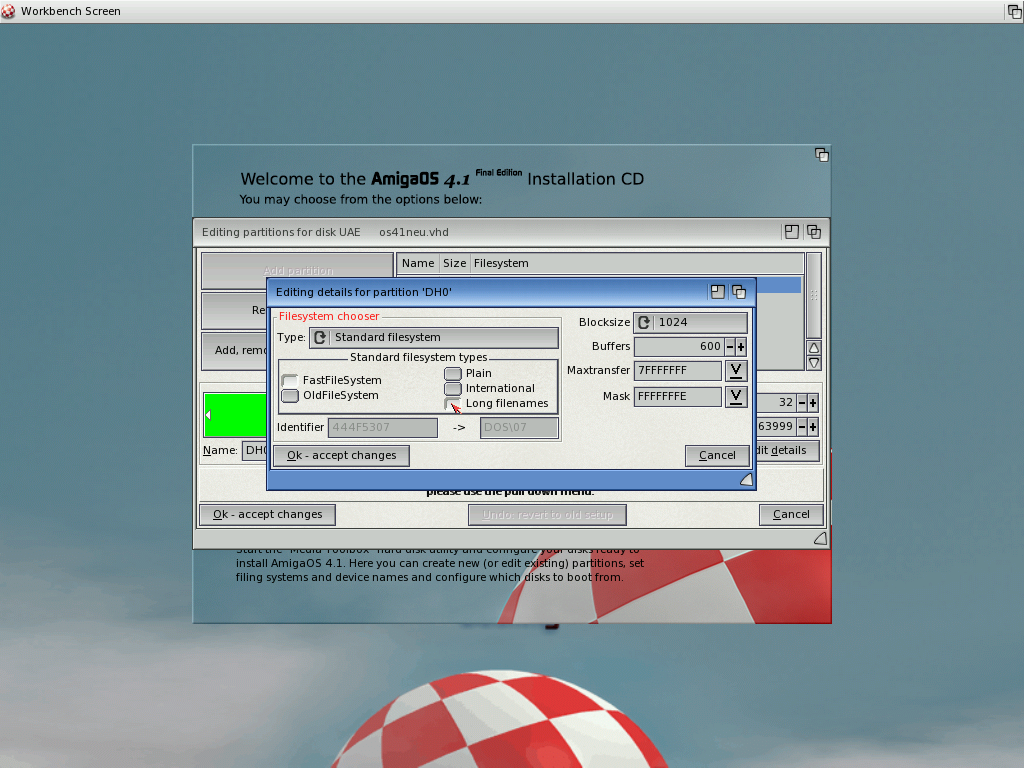
| 27. | 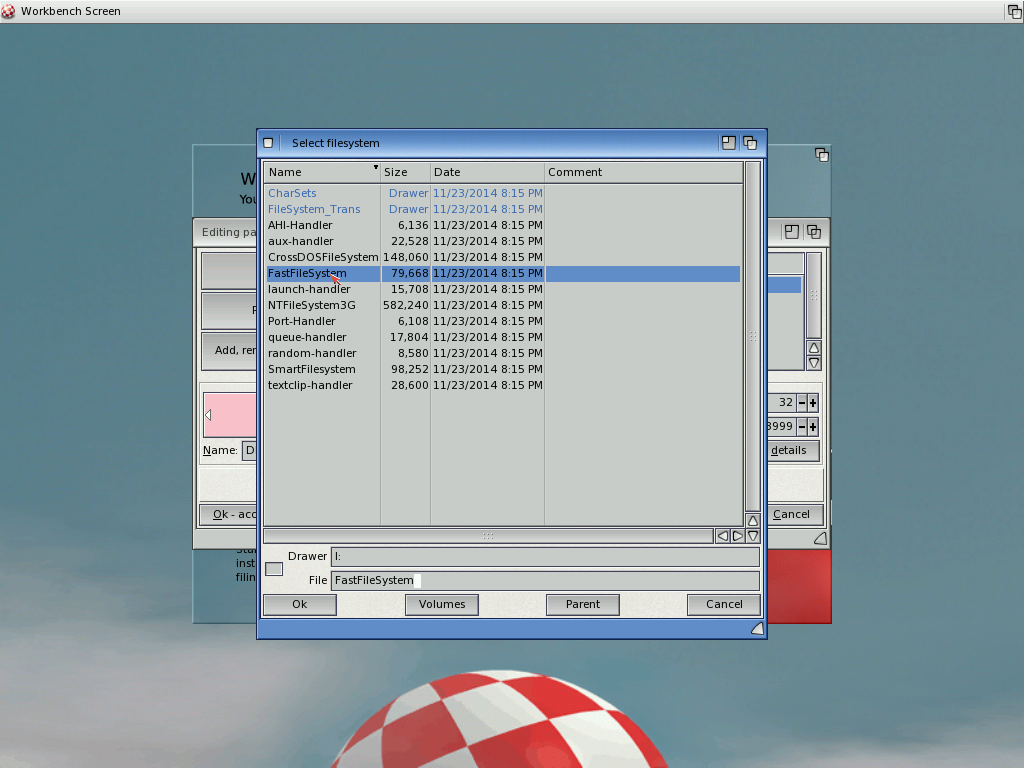 | Select the file matching the file system you chose before, either FastFileSystem... |
28. |  | ... or SmartFileSystem. |
| 29. | 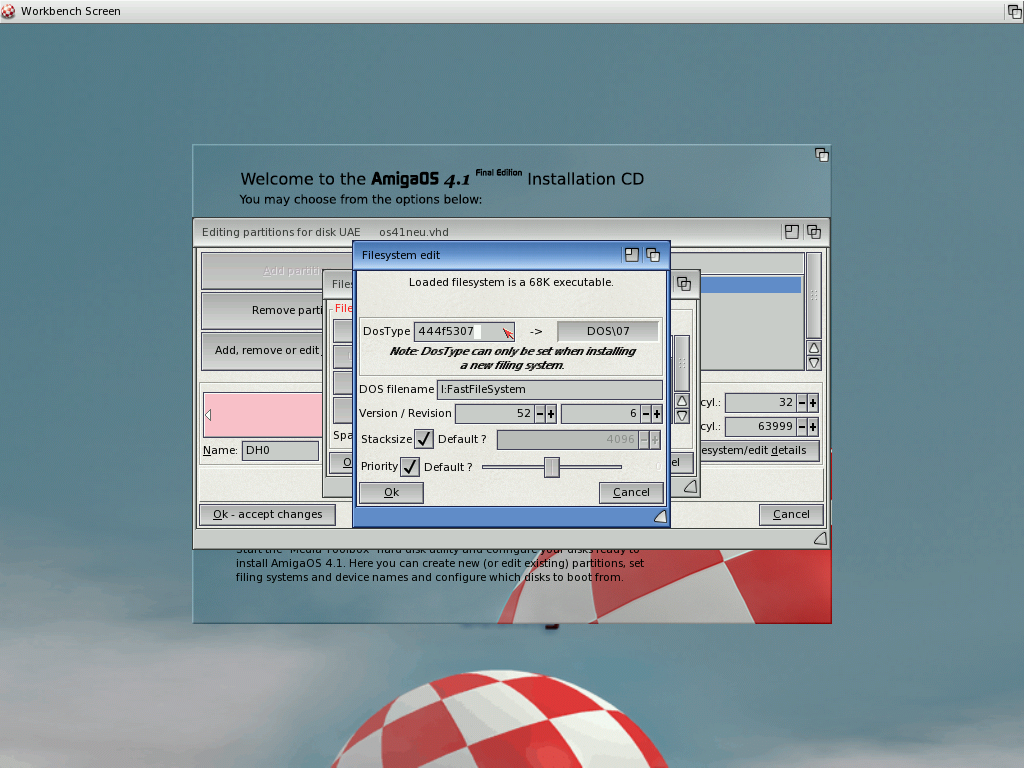 | Change the DOS type to that of the partition, either DOS\7... |
30. | 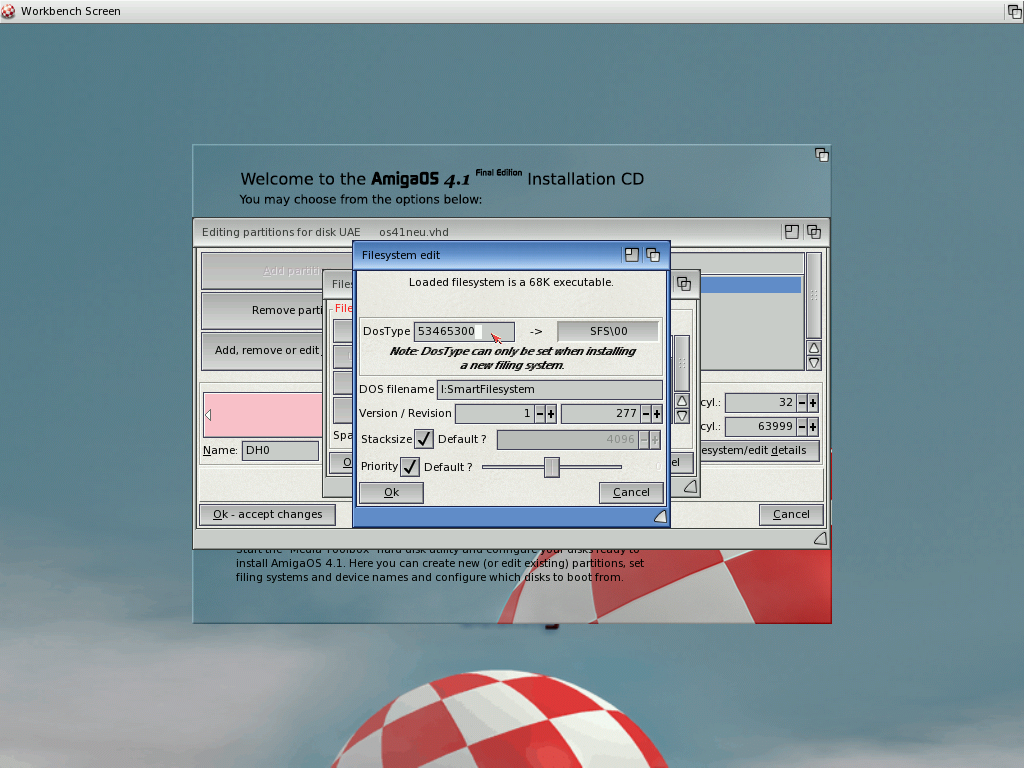 | ... or SFS\0. |
| 31. |  | Finally save everything to disk.When you leave Media Toolbox, it asks you to reboot. |
Install AmigaOS
|
| 32. |  | After the reboot we can start the installation utilitiy. |
33. |  | Welcome. |
| 34. |  | Agreement. |
35. |  | Info. |
| 36. | 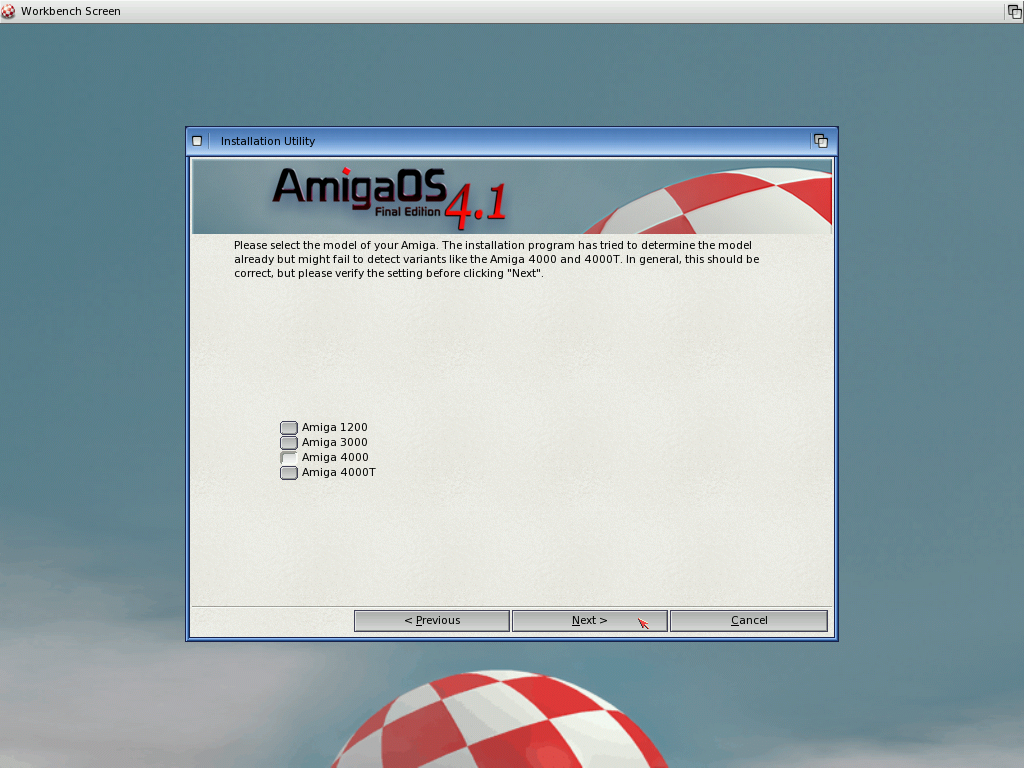 | The correct Amiga model should be preselected. |
37. | 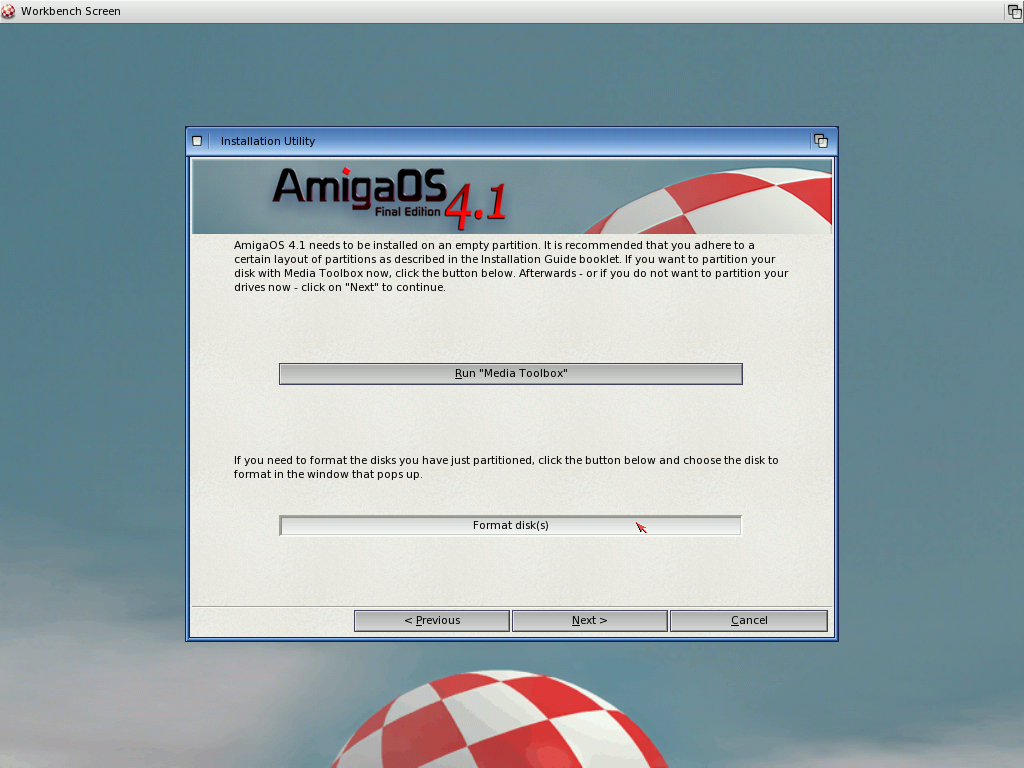 | The new partition needs to be formatted before it can be used. |
| 38. |  | Select the harddisk. |
39. | 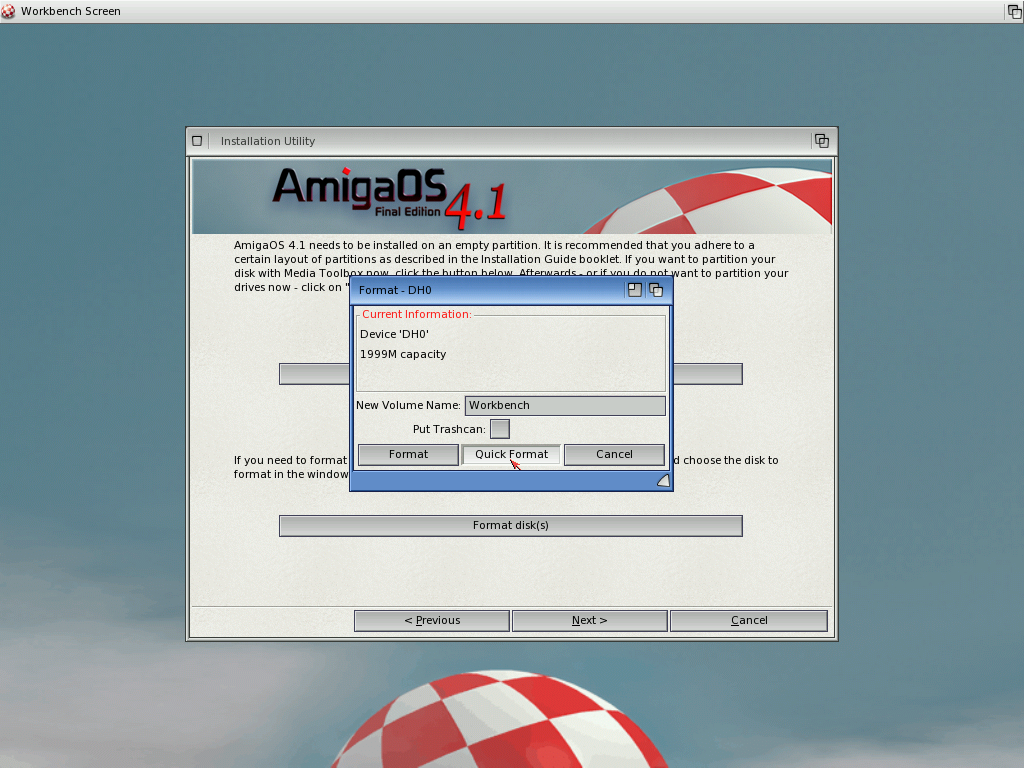 | Enter a name and use Quick Format. |
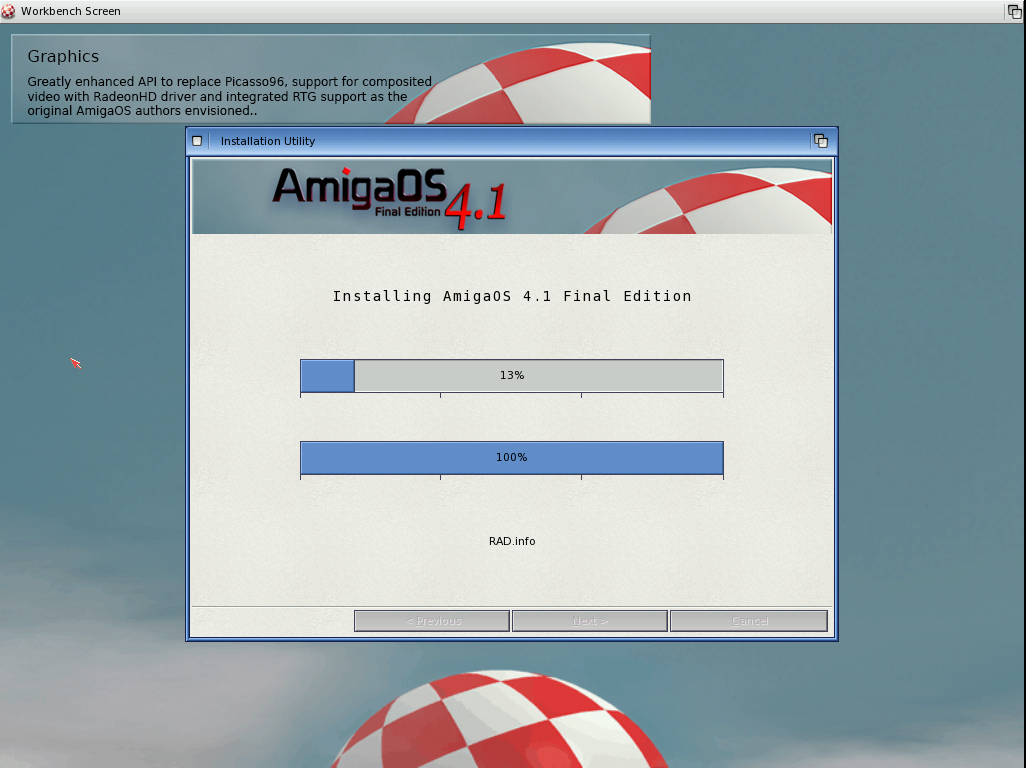
| 40. |  | Now the real installation can begin. Select the harddisk as destination. |
41. |  | Select the right graphics card. |
| 42. |  | Boot VGA is not needed for WinUAE. |
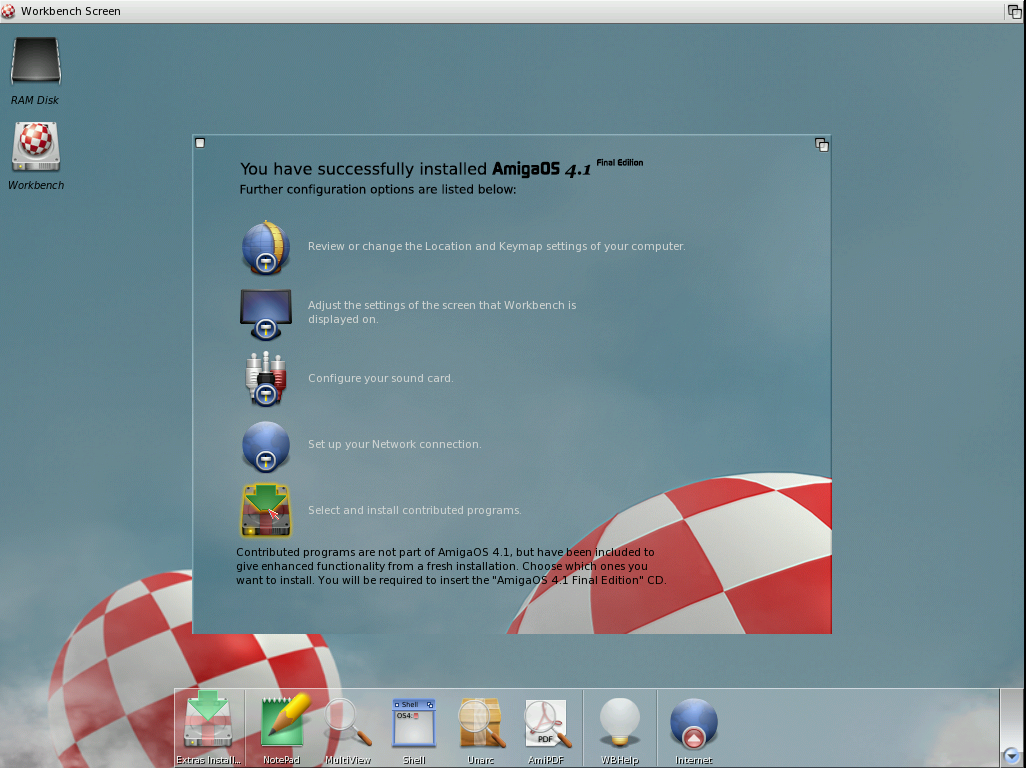
43. |  | Select the native resolution of your monitor or the highest resolution the monitor can display. |
| 44. | 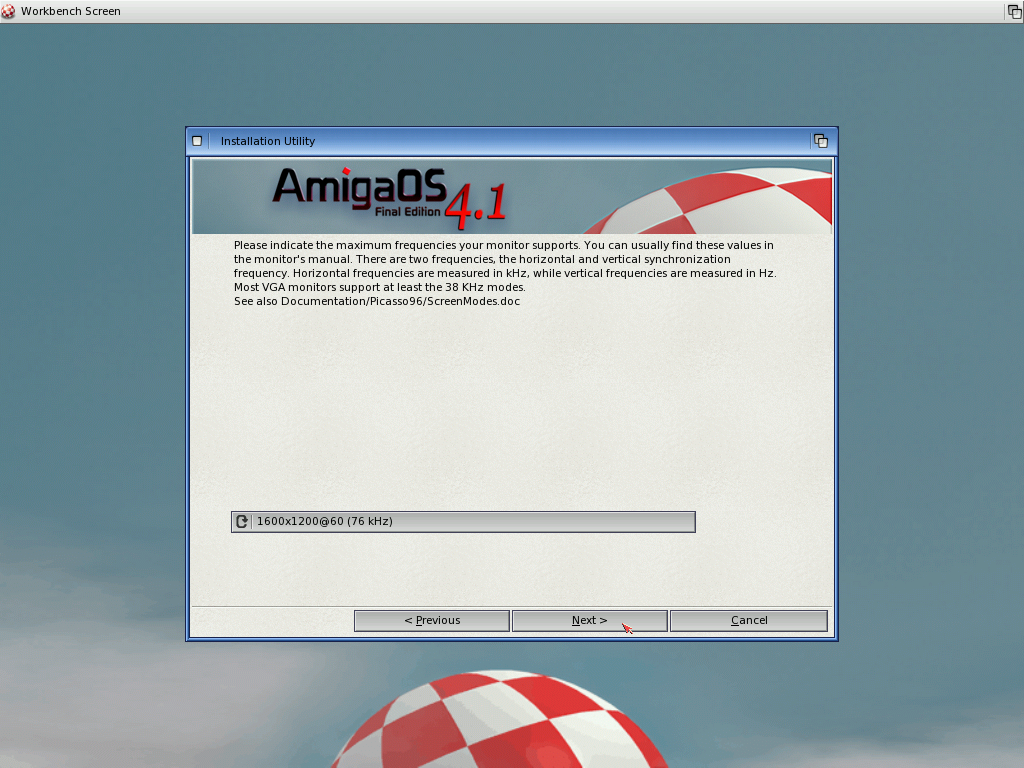 | |
45. |  | Make sure that cybppc.device is checked. |
| 46. | 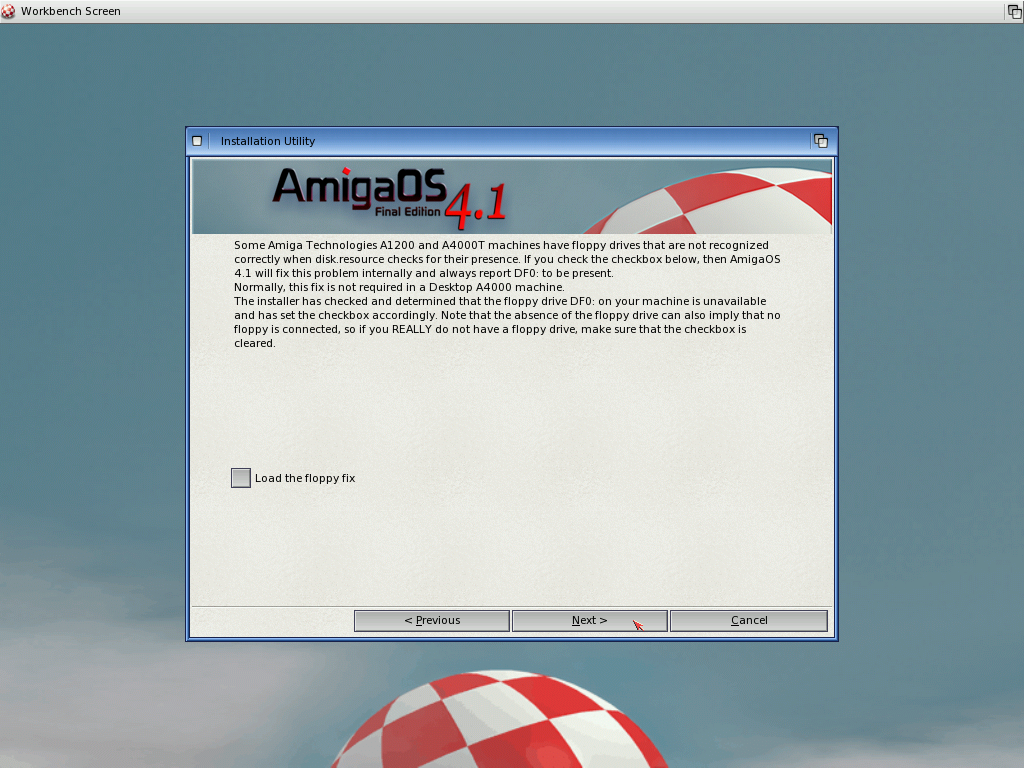 | Uncheck the floppy fix! |
47. |  | Base page access should not be enabled. |
| 48. |  | Ready to begin. |
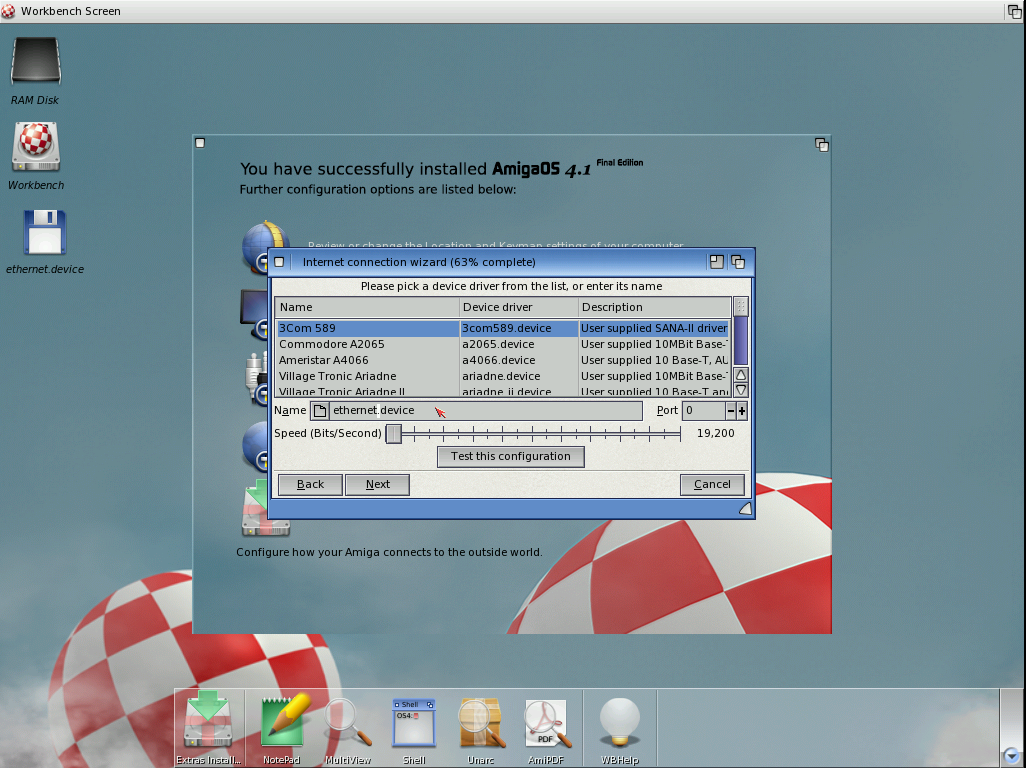
49. |  | Tea time. |
| 50. | 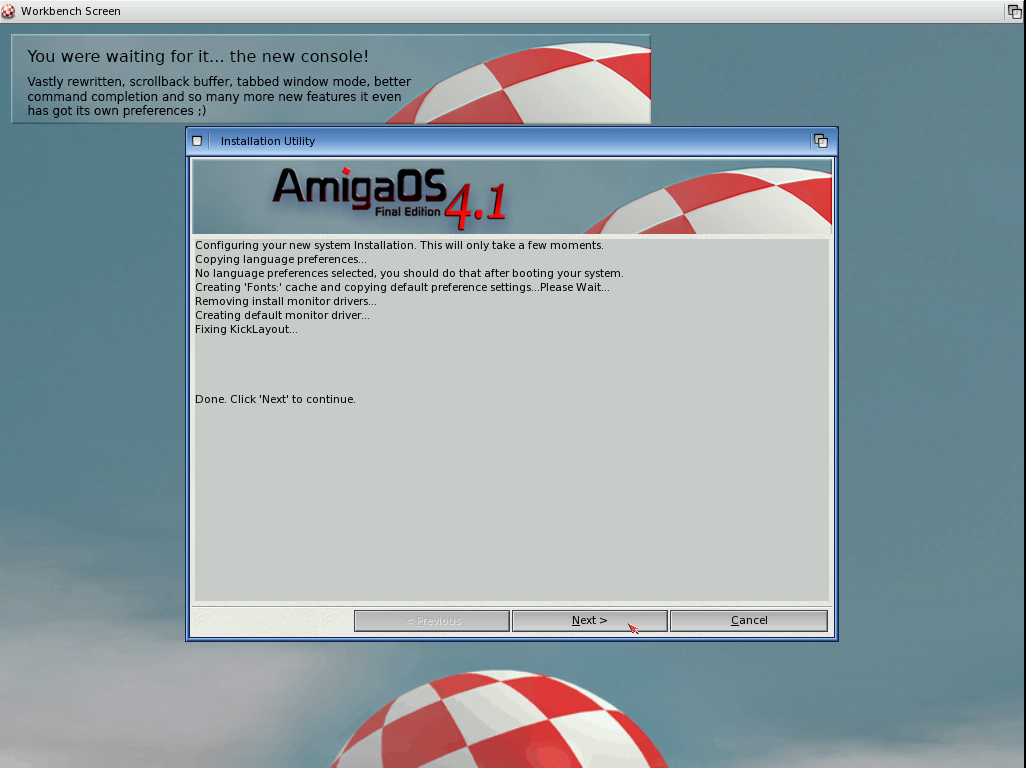 | Almost done. |
51. |  | Press F12, eject the CD and click on Ok. |
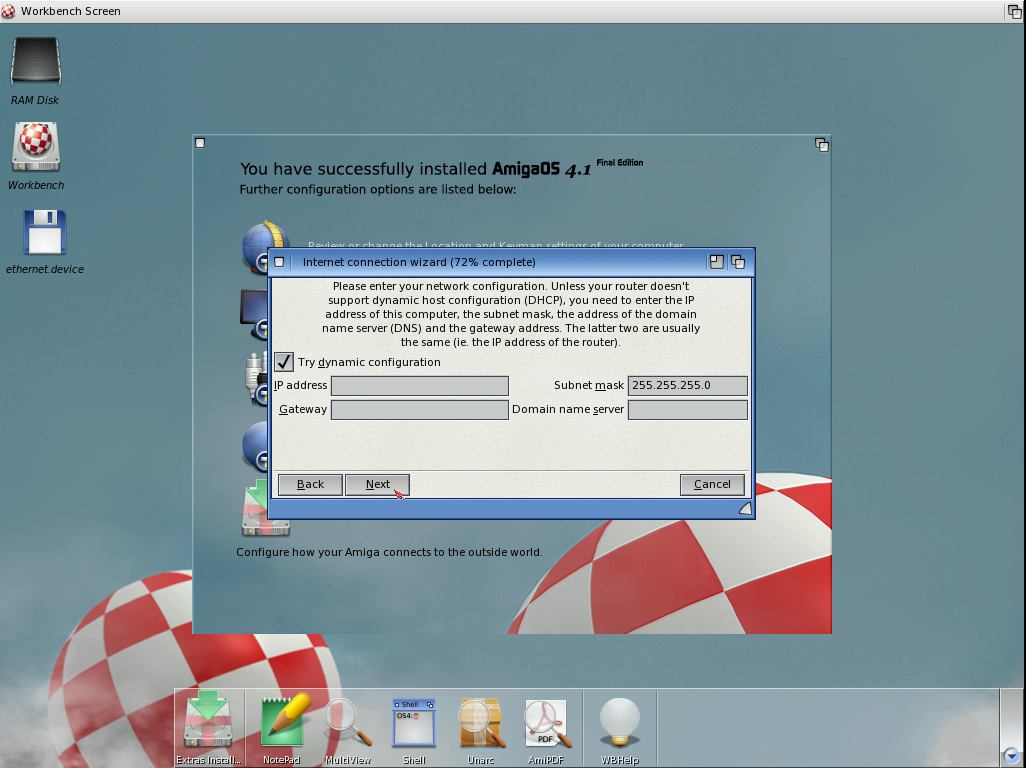
| 52. |  | Now you can click on Finish and let it reboot. |
53. | 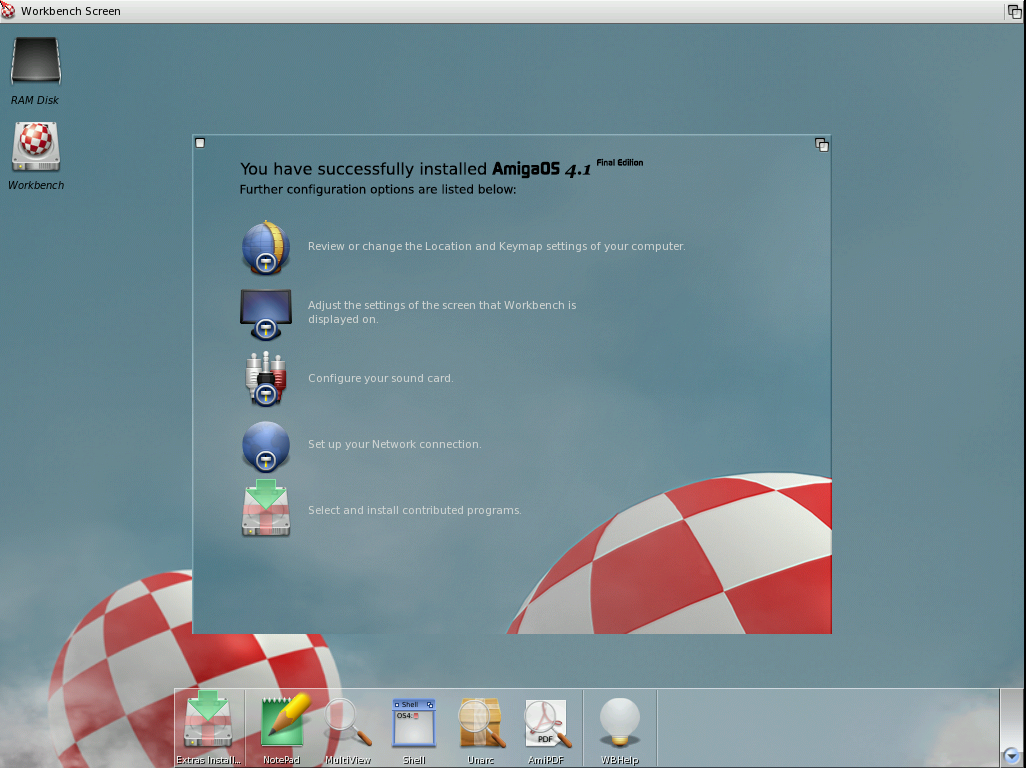 | Installation done. Now let's customize. |
Establish network connection
|
| 54. | 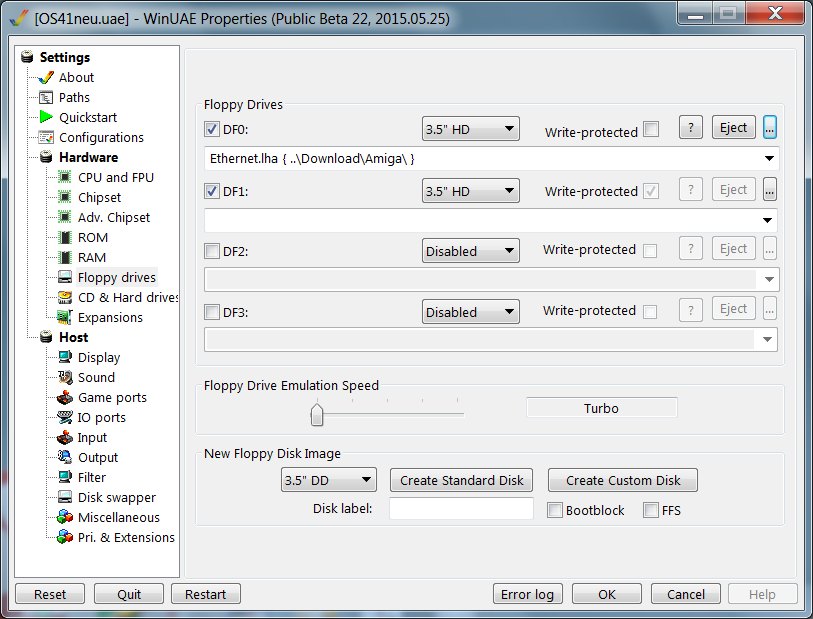 | Use your PC to download Ethernet.lha from Aminet. In WinUAE press F12, go to the "Floppy drives" page and insert Ethernet.lha into DF0. Click Ok. |
55. | 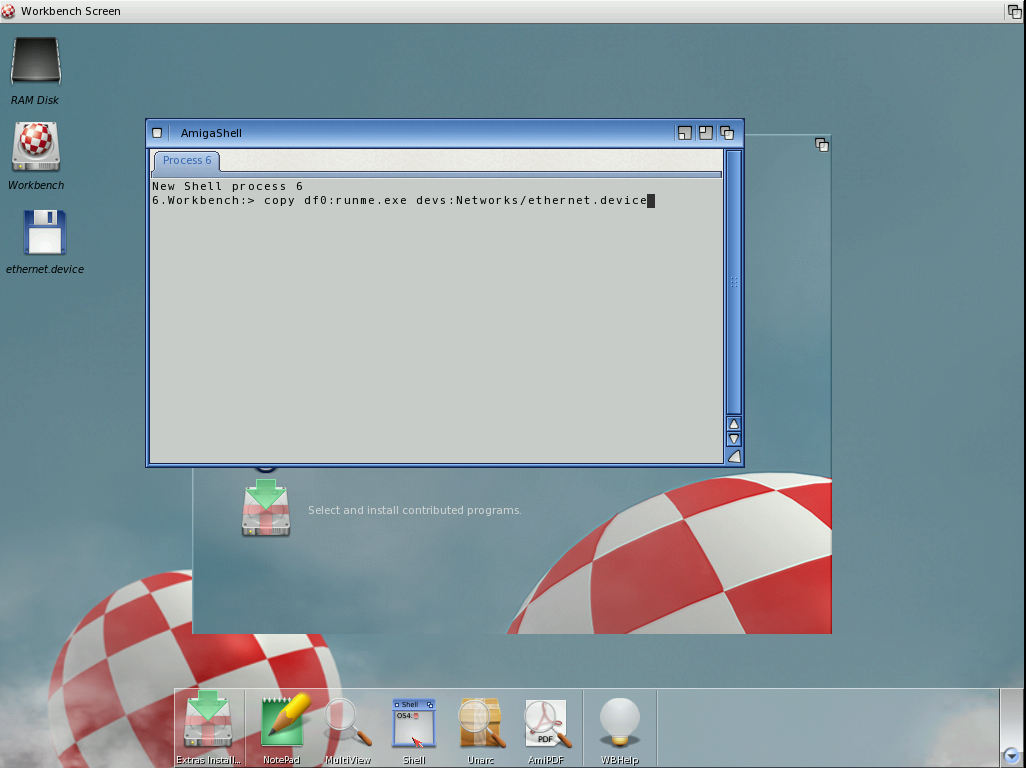 | Open a Shell window and copy runme.exe from DF0: to Devs:Networks as ethernet.device (all lower case). |
| 56. | 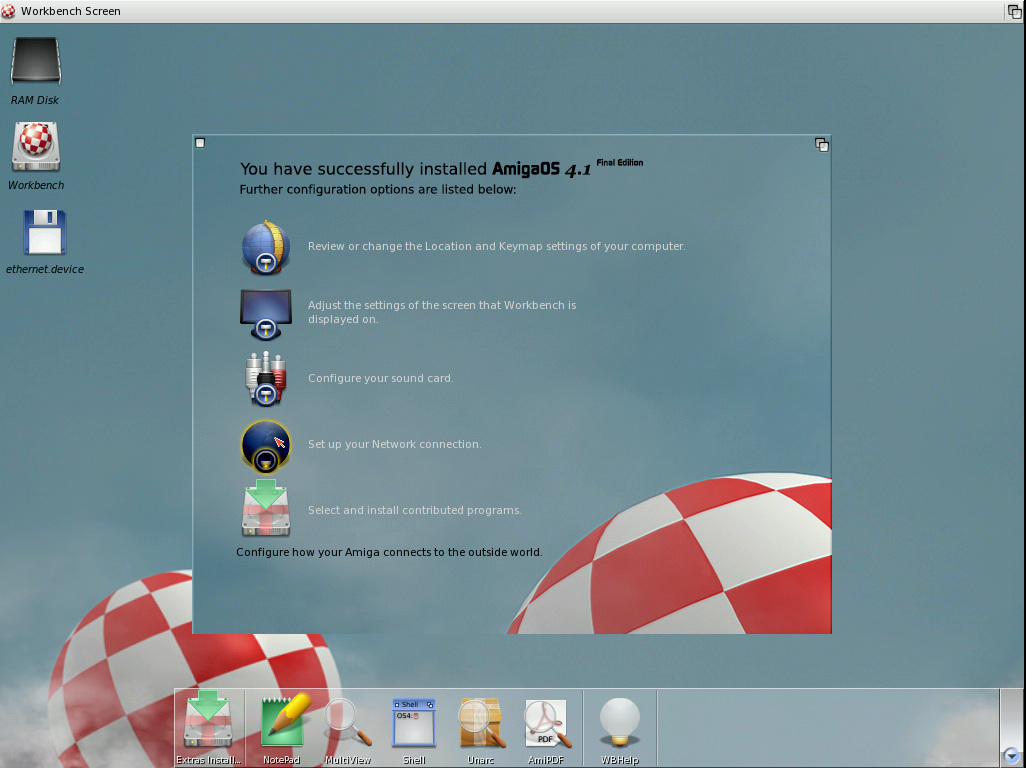 | Now we can configure the network connection. |
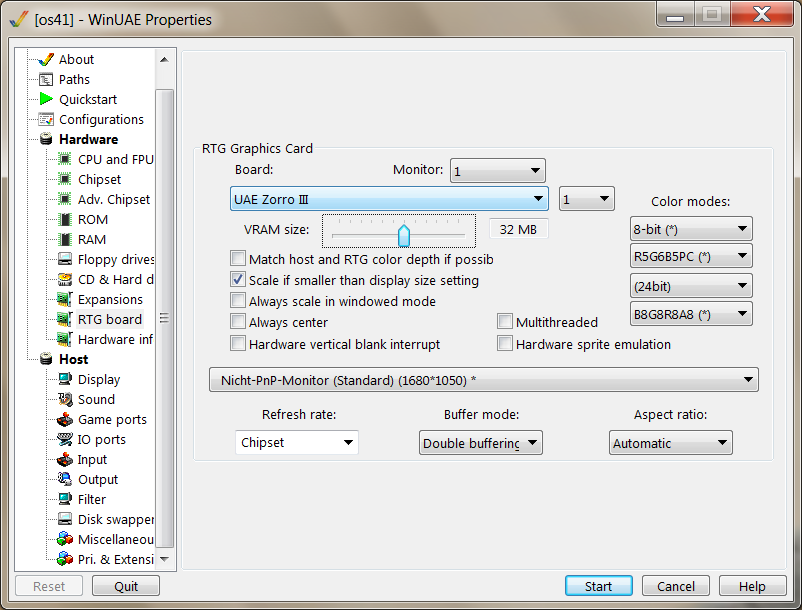
57. |  | WinUAE emulates a virtual router, so we are always in a local area network, no matter how Windows connects to the internet. |
| 58. | 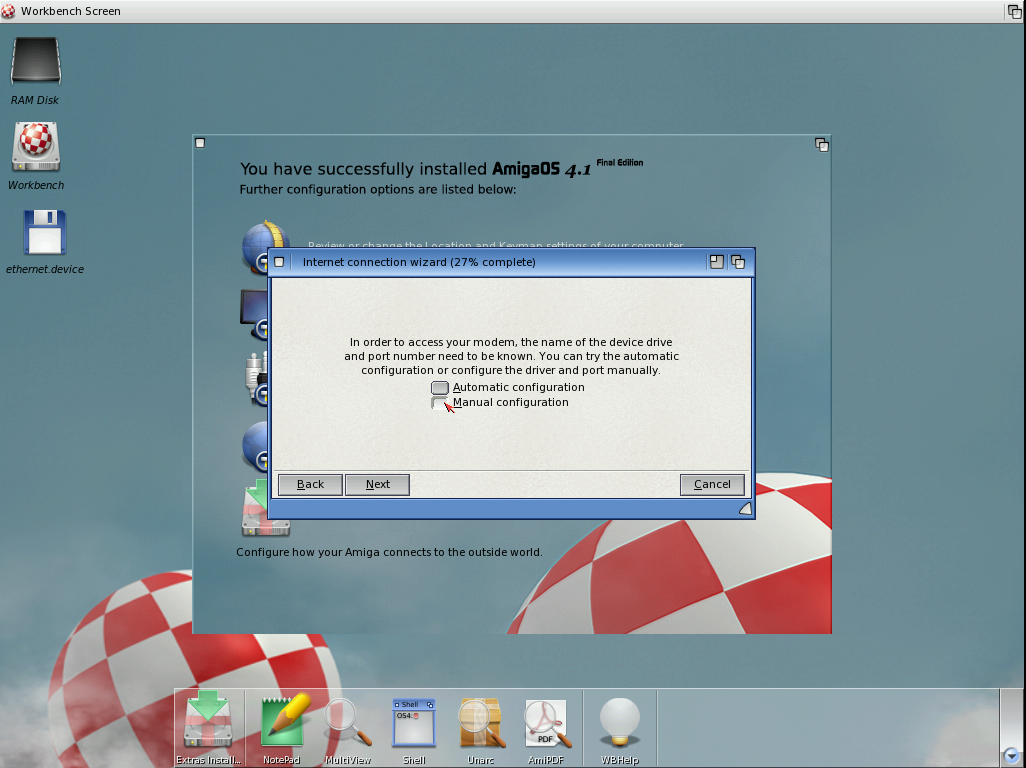 | Ethernet.device is not known to Roadshow, so we have to enter the name manually. |
59. |  | Enter ethernet.device (all lower case) to the Name field and click on Test. |
| 60. | 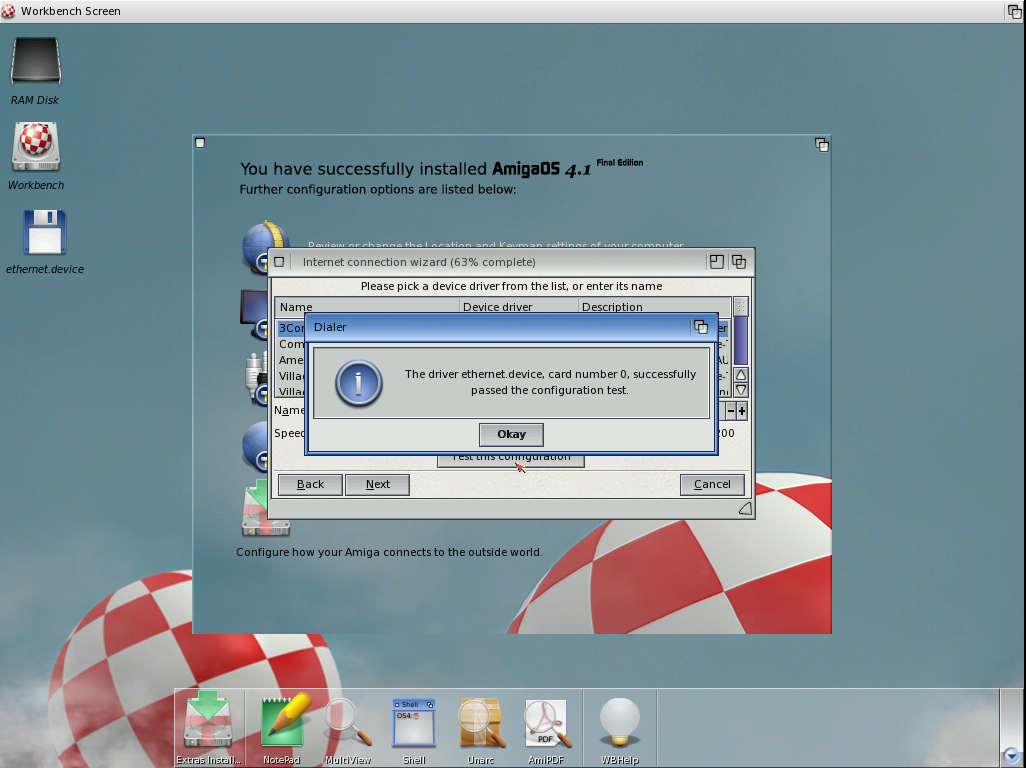 | Test successful. |
61. |  | WinUAE's virtual router supports DHCP and dictates IP addresses anyway, so dynamic configuration is the right choice. |
| 62. | 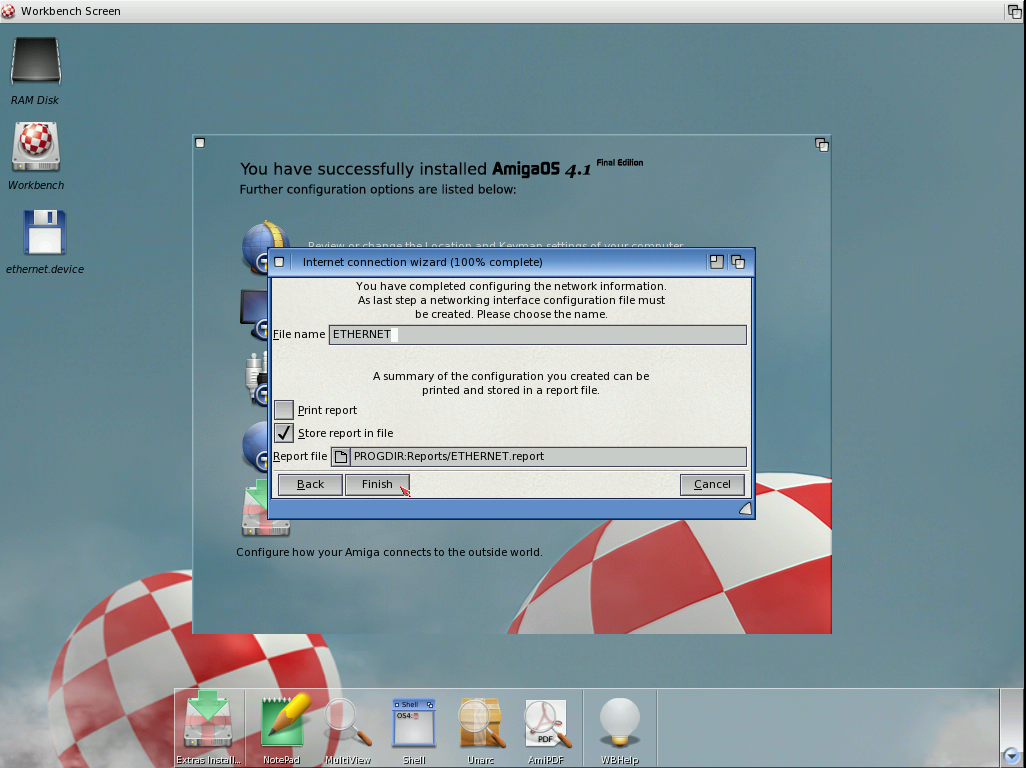 | Enter a name to save the connection, then finish the network configuration. |
63. |  | Now we need a web browser. OWB is part of the contributed programs. |
| 64. | 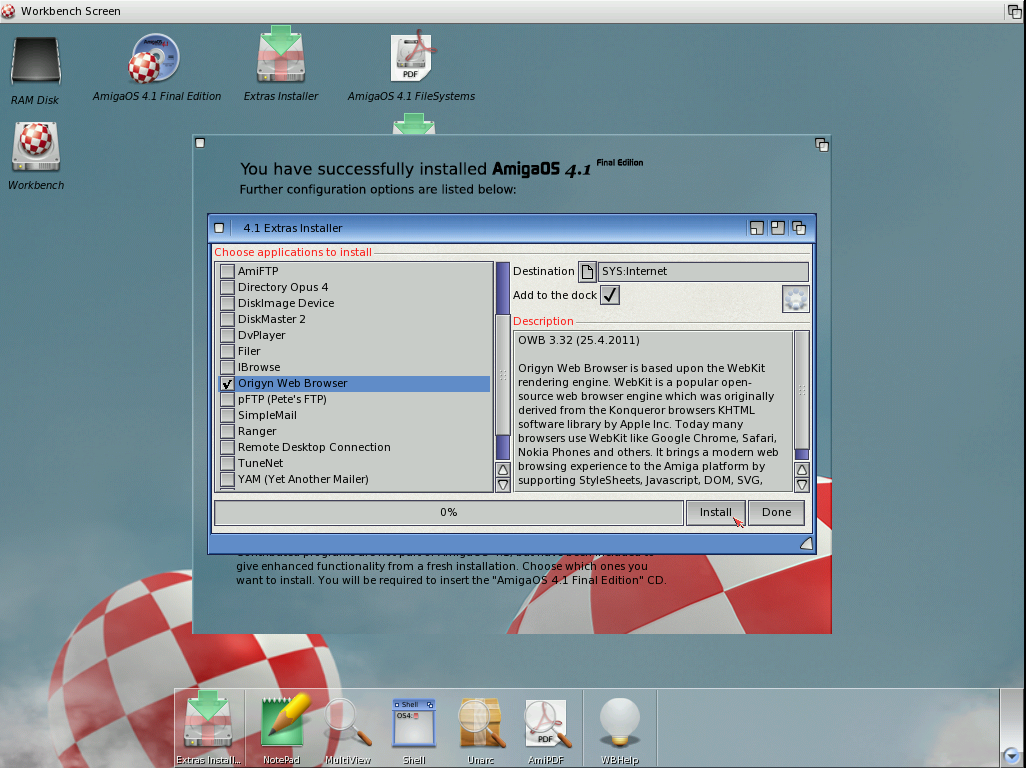 | Select OWB and let it install. |
Enable UAE extensions
|
| 65. |  | In order to use higher resolutions and color depths you should use the uaegfx board. Open Devs/Monitors, select the PicassoIV icon and choose Icon Information from the menu. |
66. |  | On the file tab change the name from PicassoIV to uaegfx and on the icon tab change BOARDNAME=PicassoIV to BOARDNAME=uaegfx. Then click on Save. |
| 67. | 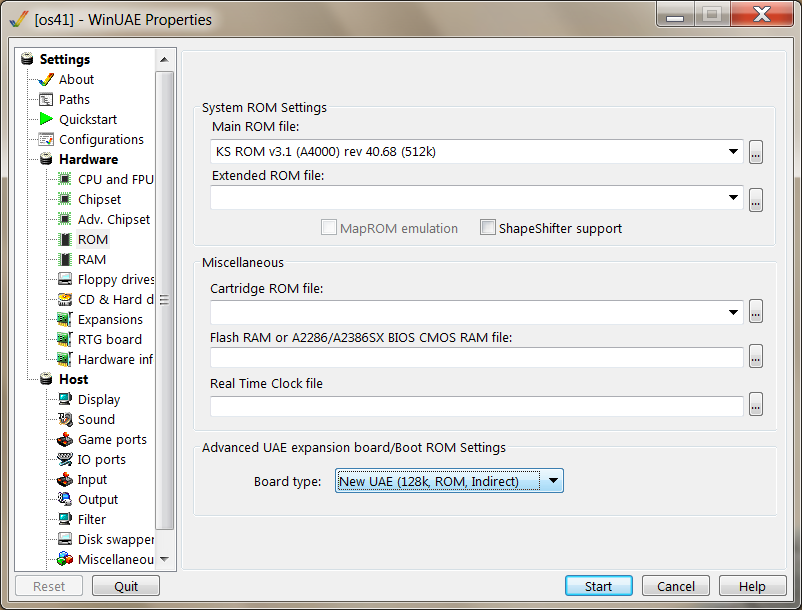 | Now press F12 and click on Restart. Go to the ROM page and check that Board type at the bottom is set to New UAE (128k, ROM, Indirect). |
68. |  | Go to the RTG board page and change Board from PicassoIV to UAE Zorro III. |
| 69. | 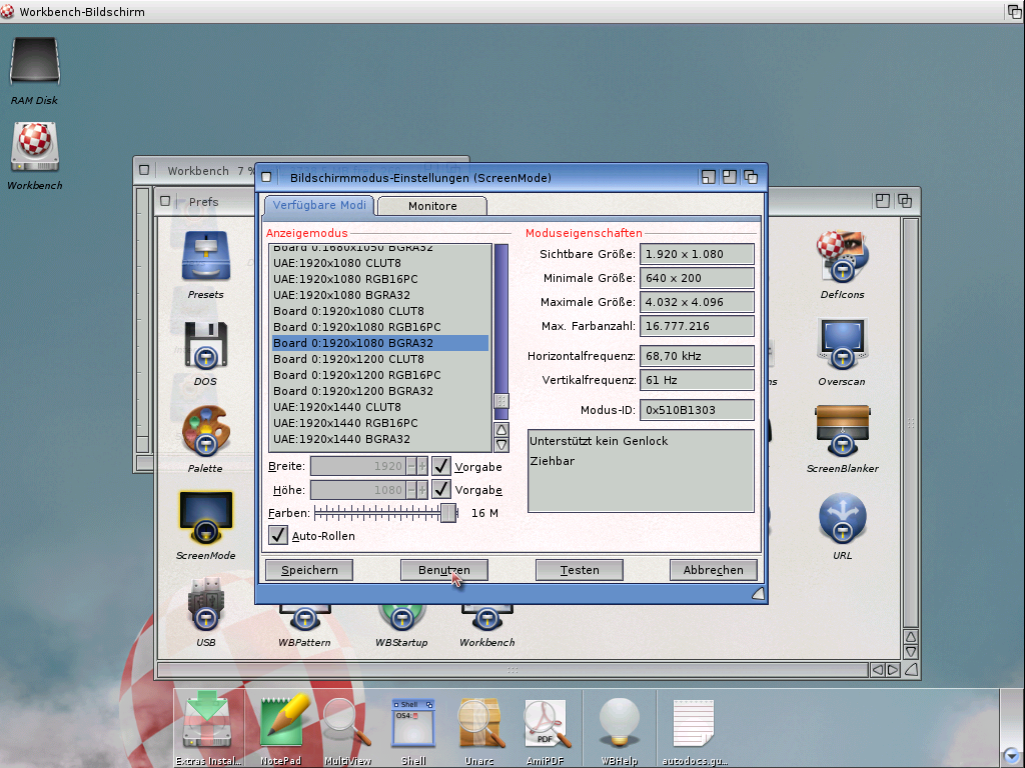 | Save the config and click on Start. Once OS4 has loaded you can run Prefs/ScreenMode and select a higher resolution. |
Workshops
|

